그누보드5 설치 후 게시판 달기
닷홈에서 도메인을 만들어놓고, 간단한 html과 css를 만들어 업로드한 후,
그누보드를 이용해 게시판을 다는 것을 배웠다.
이전 글에서 이어지는 글이니, 이전 글을 참고하면 된다 !
https://poseybutter-insight.tistory.com/139
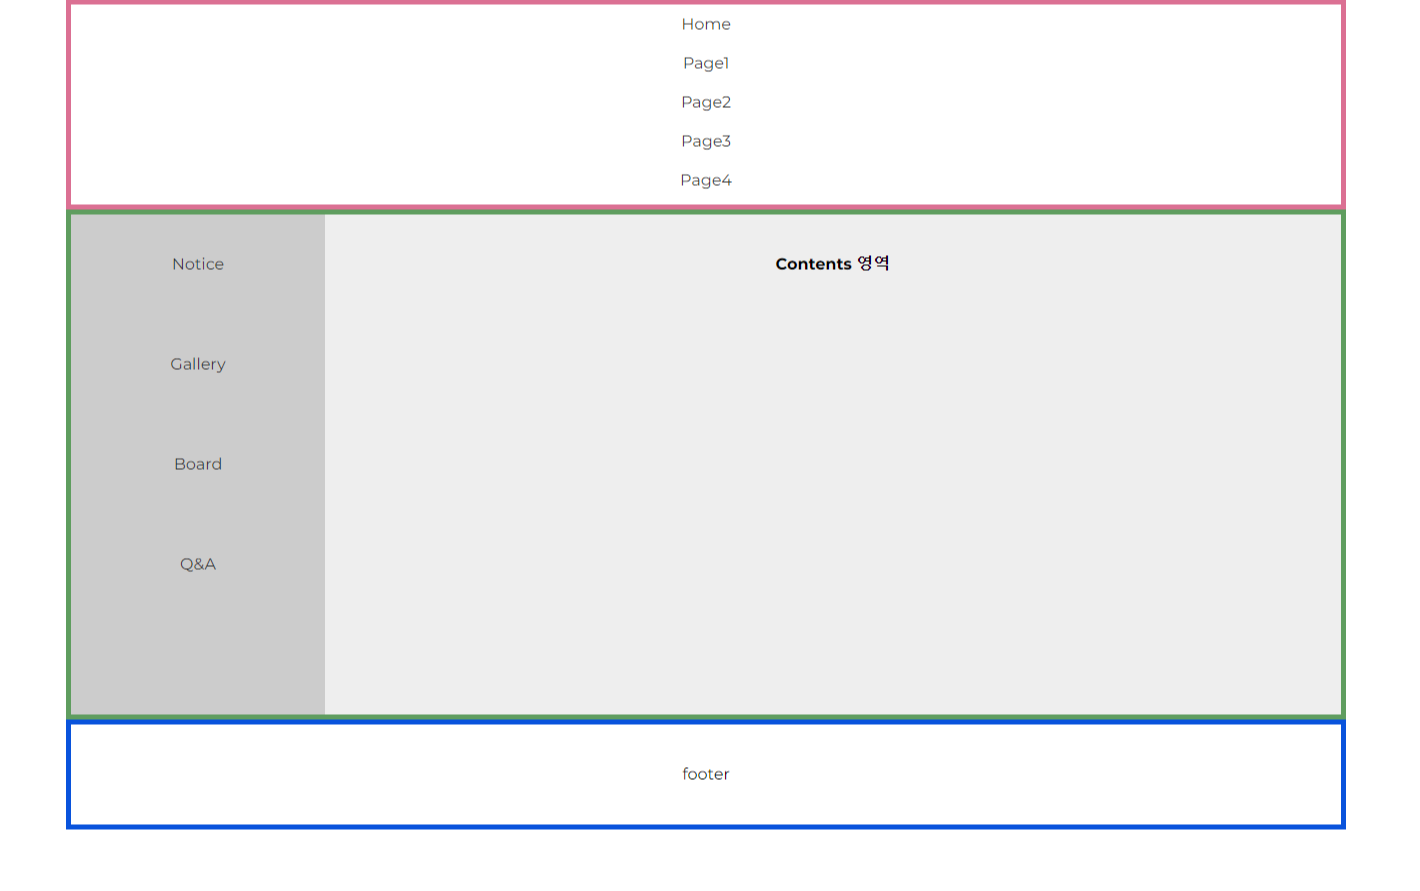
이전 글에서 여기까지는 완성한 상태이다.
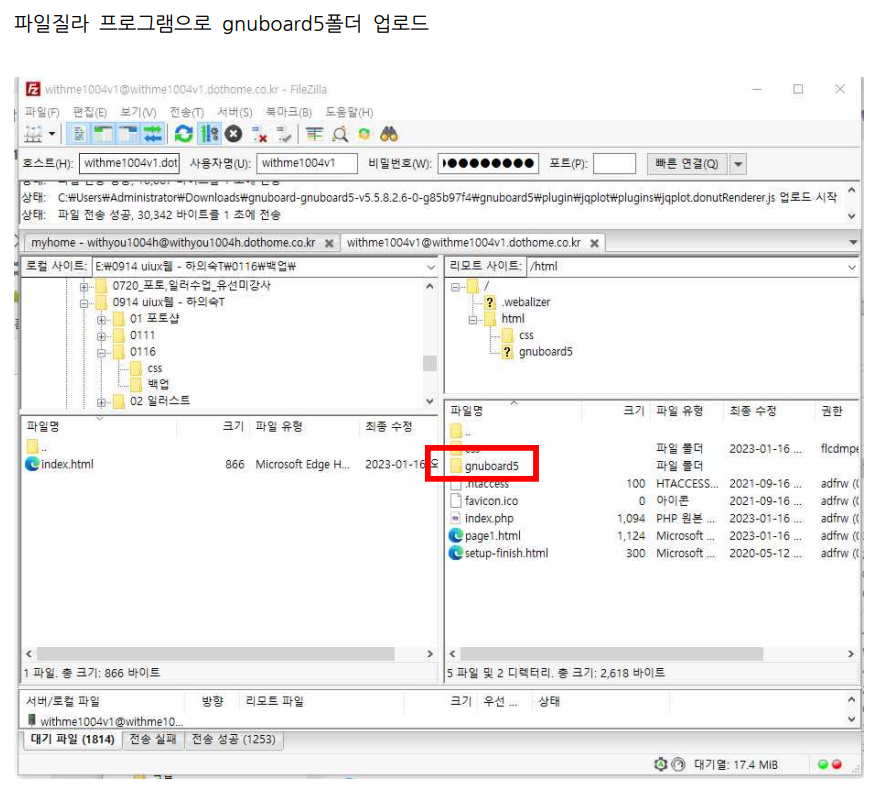
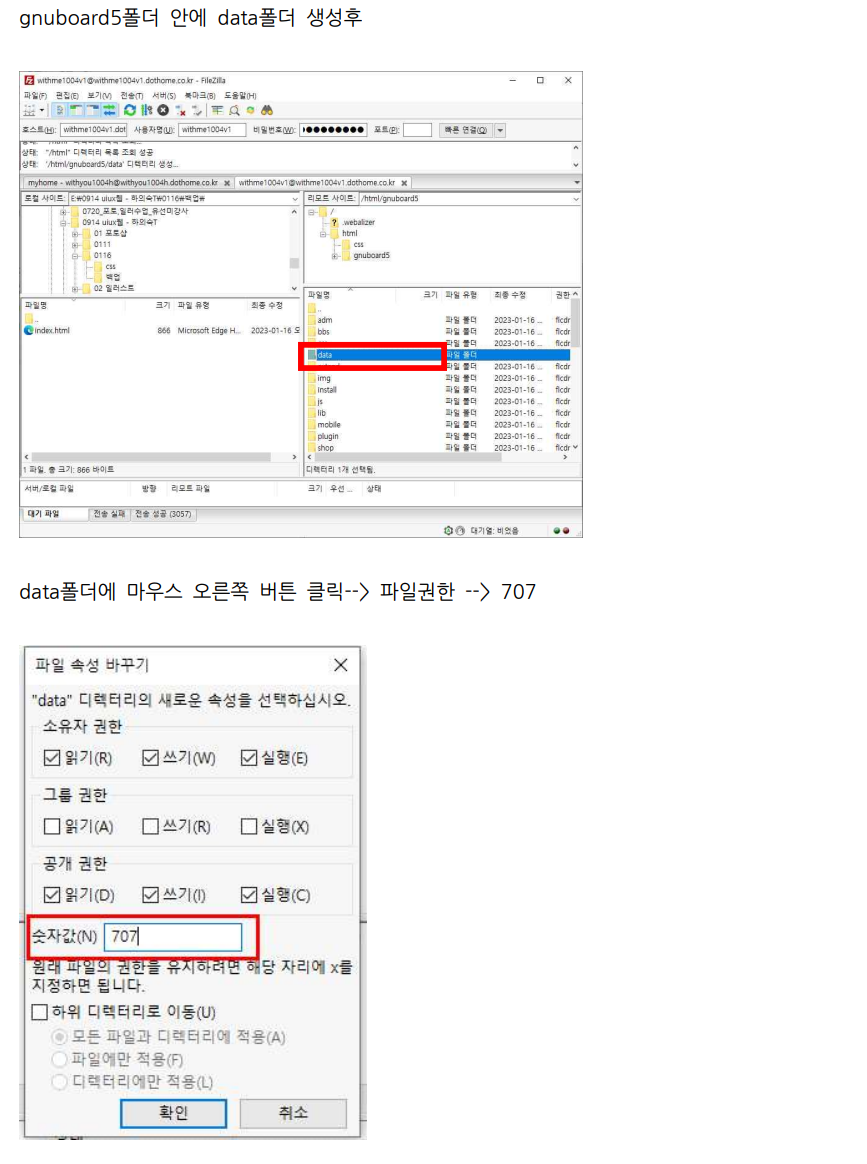
그누보드를 일단 설치해야하는데, 밑의 메뉴얼대로 따라 설치하면 된다.
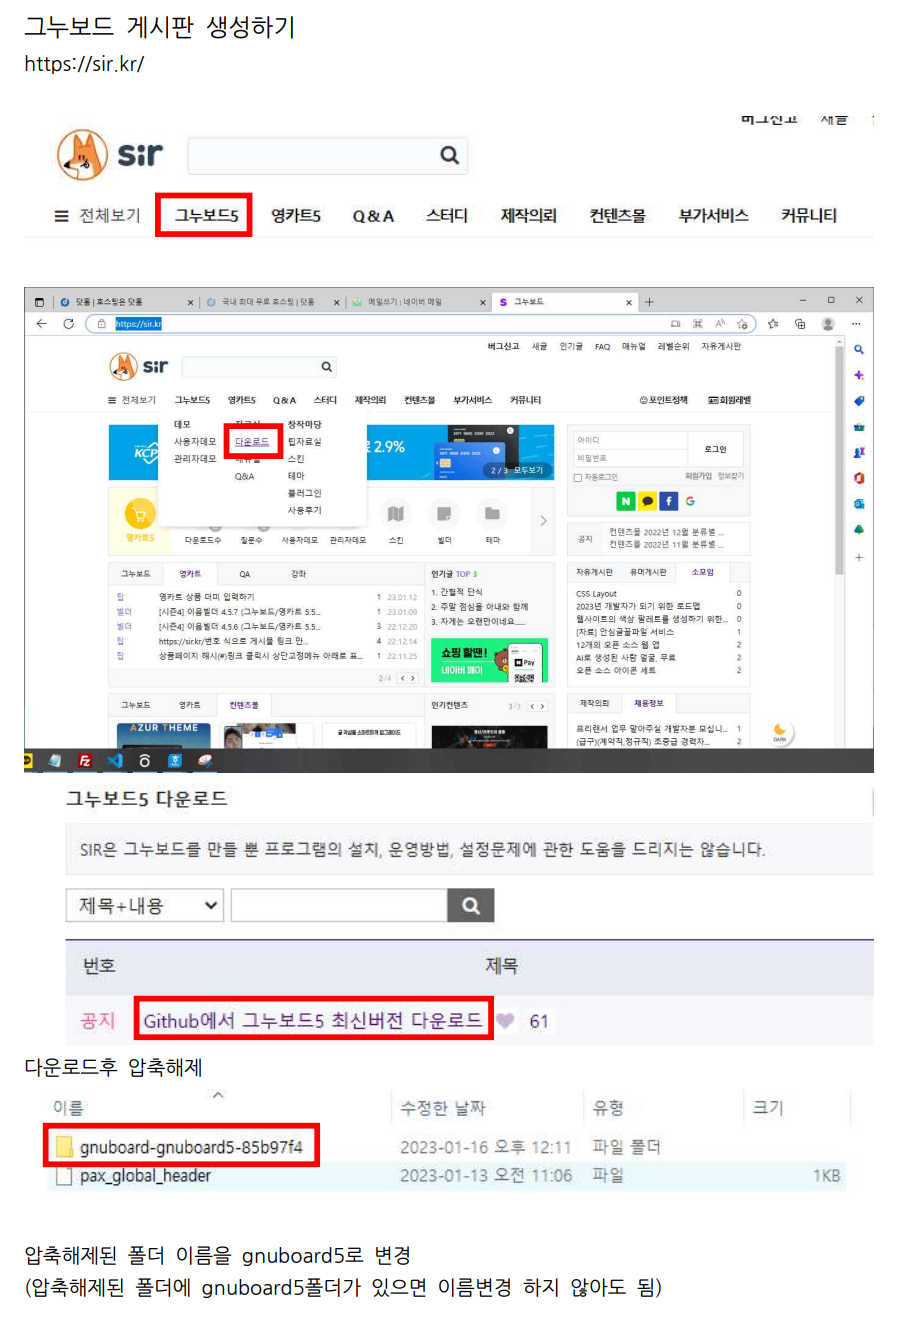
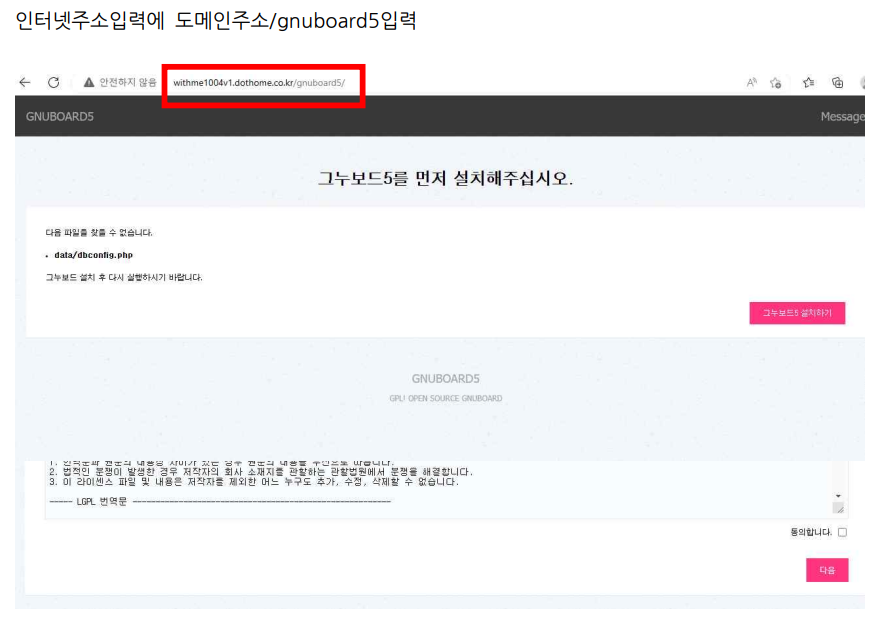
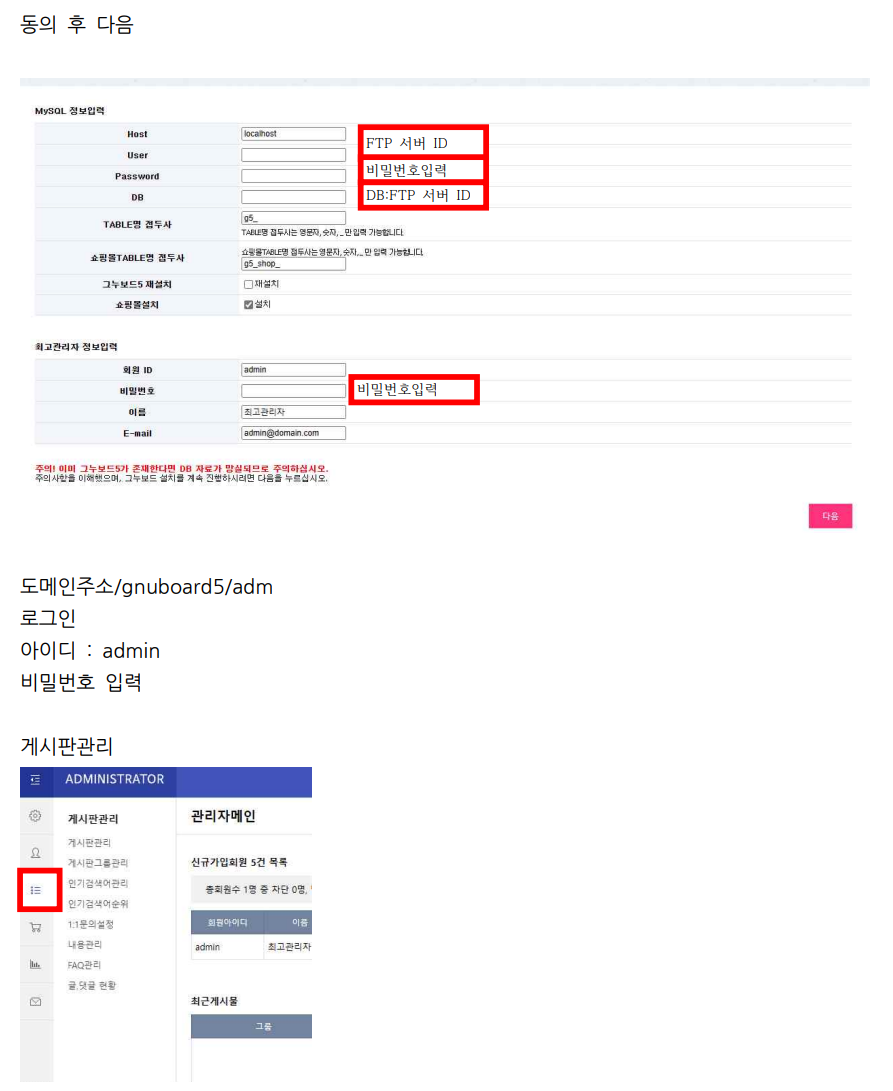
로그인까지하면 일단 50%는 끝난 것이다 !
일단 나는 더 보기 좋게 만들기 위해 CSS를 수정했다.
@charset "utf-8";

@import url("https://fonts.googleapis.com/css2?family=Montserrat:wght@400;500;600;700&display=swap");

* {
  margin: 0;
  padding: 0;
}

ul,
li {
  list-style: none;
}

a {
  text-decoration: none;

  color: #333;
}

body {
  font: 1em "Montserrat", 돋움, Doctum, sans-serif;
}

#wrap {
  width: 100%;
  max-width: 1600px;
  margin: 0 auto;
}

.head {
  width: 100%;
  height: 100px;

  background: palegoldenrod;

  text-align: center;
  line-height: 100px;
}

.head ul {
  display: flex;
  justify-content: space-around;
}

.head ul li {
  margin-bottom: 20px;
  font-size: 20px;
}

.head ul li:hover a {
  font-weight: bold;
}

.contents {
  display: flex;
  width: 100%;
  height: 700px;
}

.contents .left {
  width: 20%;

  line-height: 100px;
  text-align: center;

  background: rgba(179, 212, 179);

  font-size: 20px;
}

.contents .left ul li {
  border-bottom: rgba(0, 0, 0, 0.5);
}

.contents .left ul li:hover a {
  font-weight: bold;
}

.contents .right {
  width: 80%;

  background: #eee;
}

.foot {
  width: 100%;
  height: 100px;

  font-size: 20px;

  line-height: 100px;
  text-align: center;

  background: powderblue;
}
이렇게 완성했고, 이제 '자기 도메인/gnuboard5/' 를 입력해 로그인한 화면으로 이동한다.
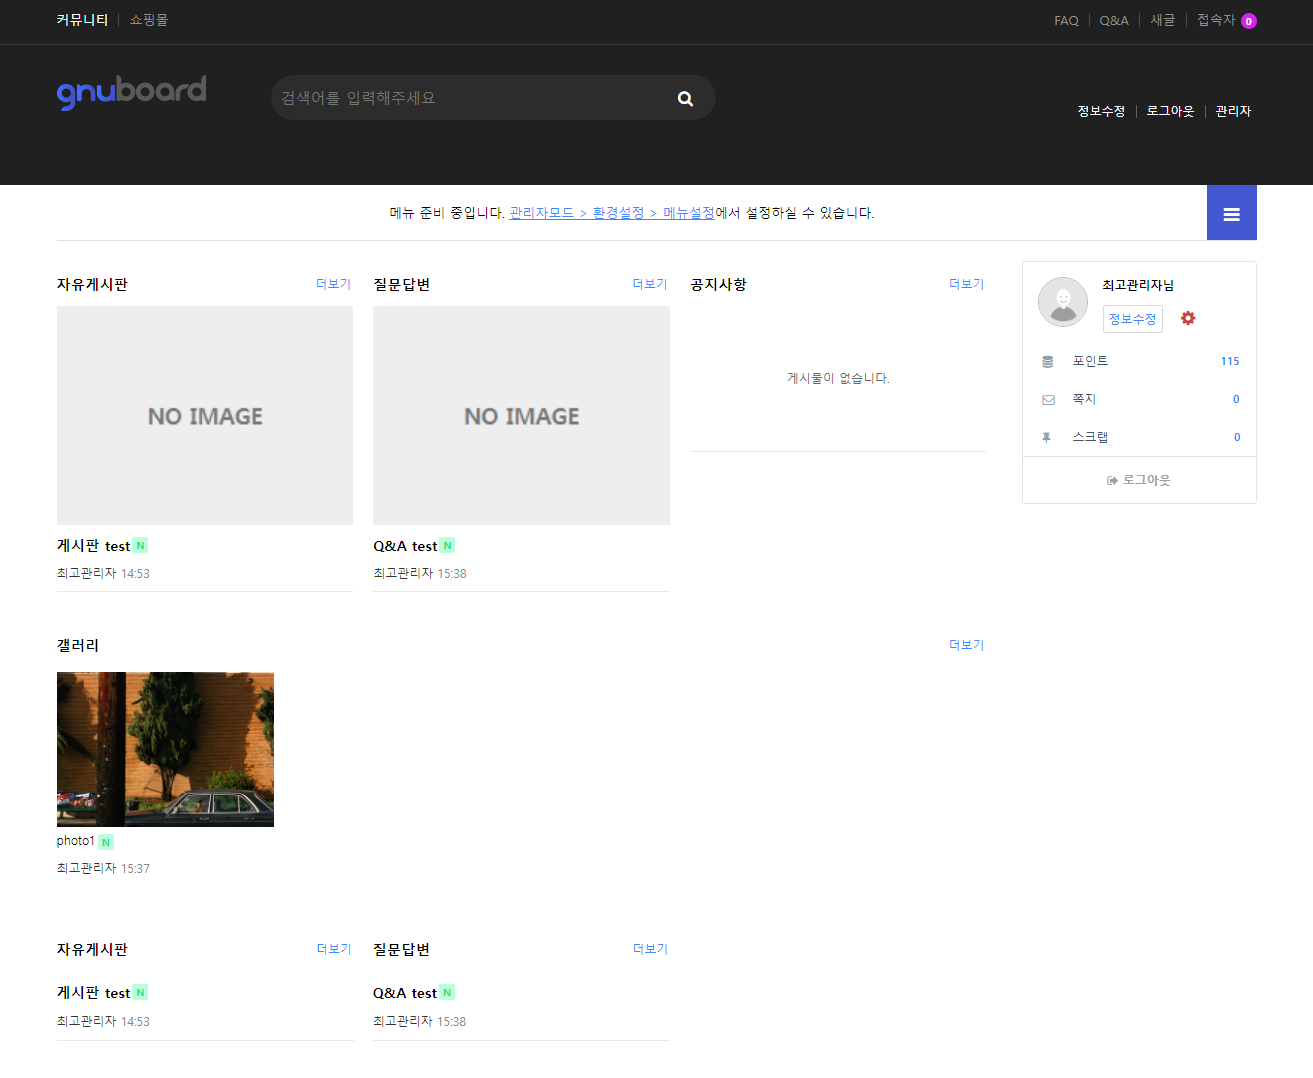
그러면 이렇게 최고관리자 라는 이름으로 로그인한 화면이 나타난다.
게시글은 아무것도 업로드하지 않은 상태라면 빈 화면으로 나타나는 것이 정상이다.
오른쪽 최고관리자님이라고 적혀있는 란에서 톱니바퀴 모양의 아이콘을 클릭하면,
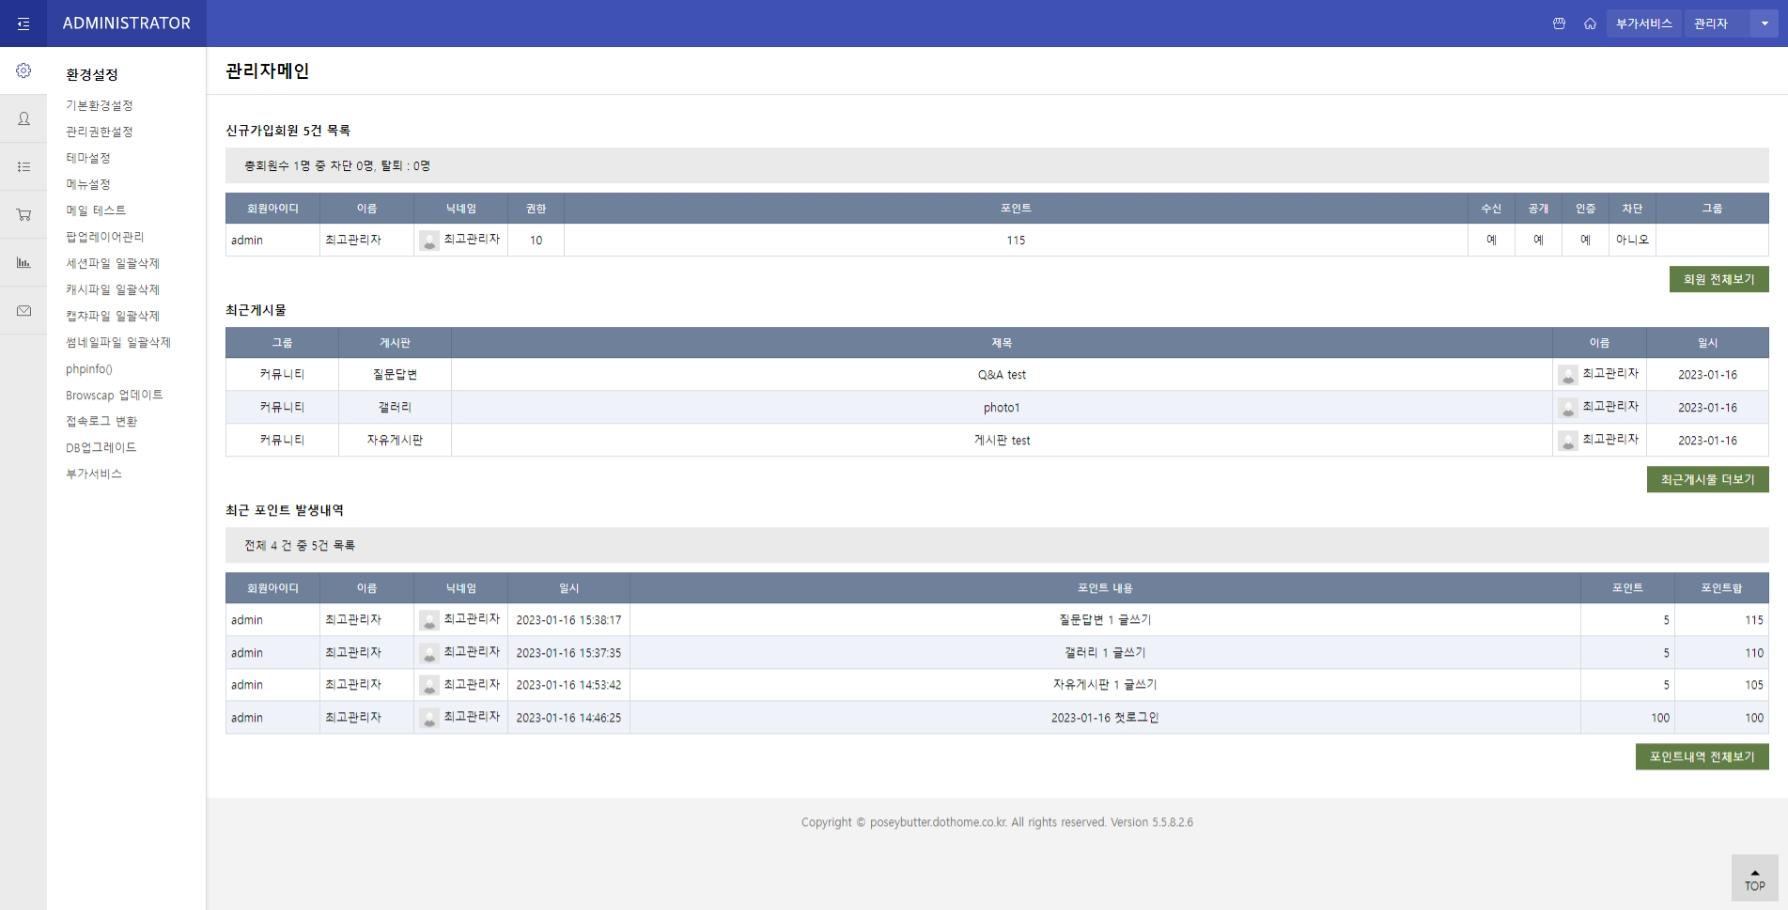
이런 화면이 나타난다.
여기서도 최근게시물과 포인트 발생 내역도 이용한 적이 없다면 빈 화면으로 나타나는 것이 정상이다.
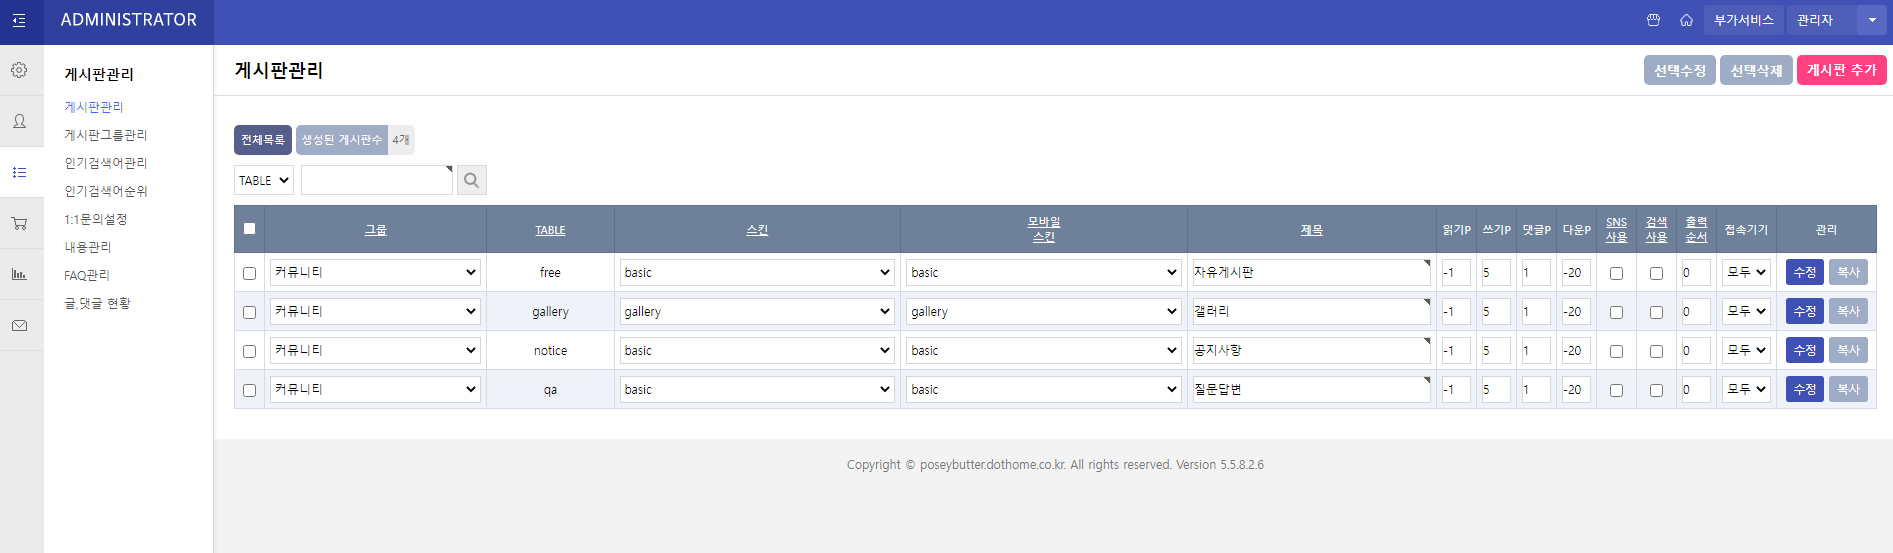
왼쪽 옵션 바에서 3번째 옵션을 클릭하고 '게시판관리'로 이동한다.
그러면 이런 화면이 뜨는데 먼저 게시판을 만들기 위해 맨 첫 번째 자유게시판 리스트에 있는 '수정' 버튼을 클릭한다.
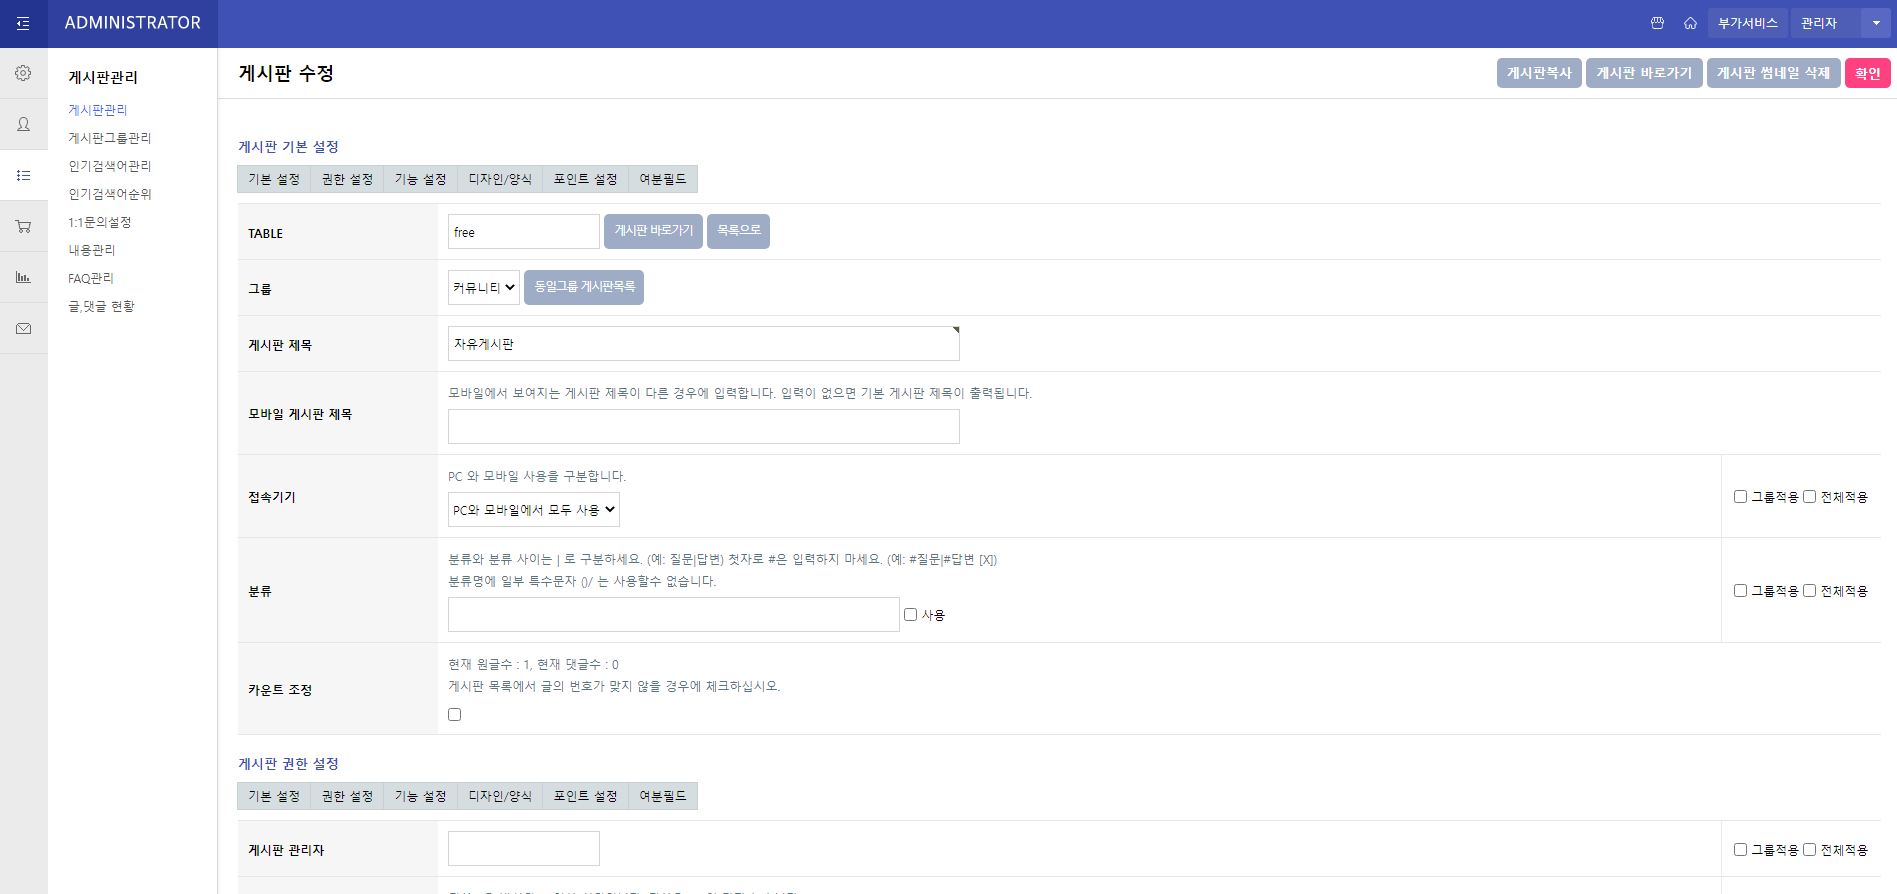
그러면 이런 화면이 나타난다. 여기서 밑으로 쭉 내려보면,
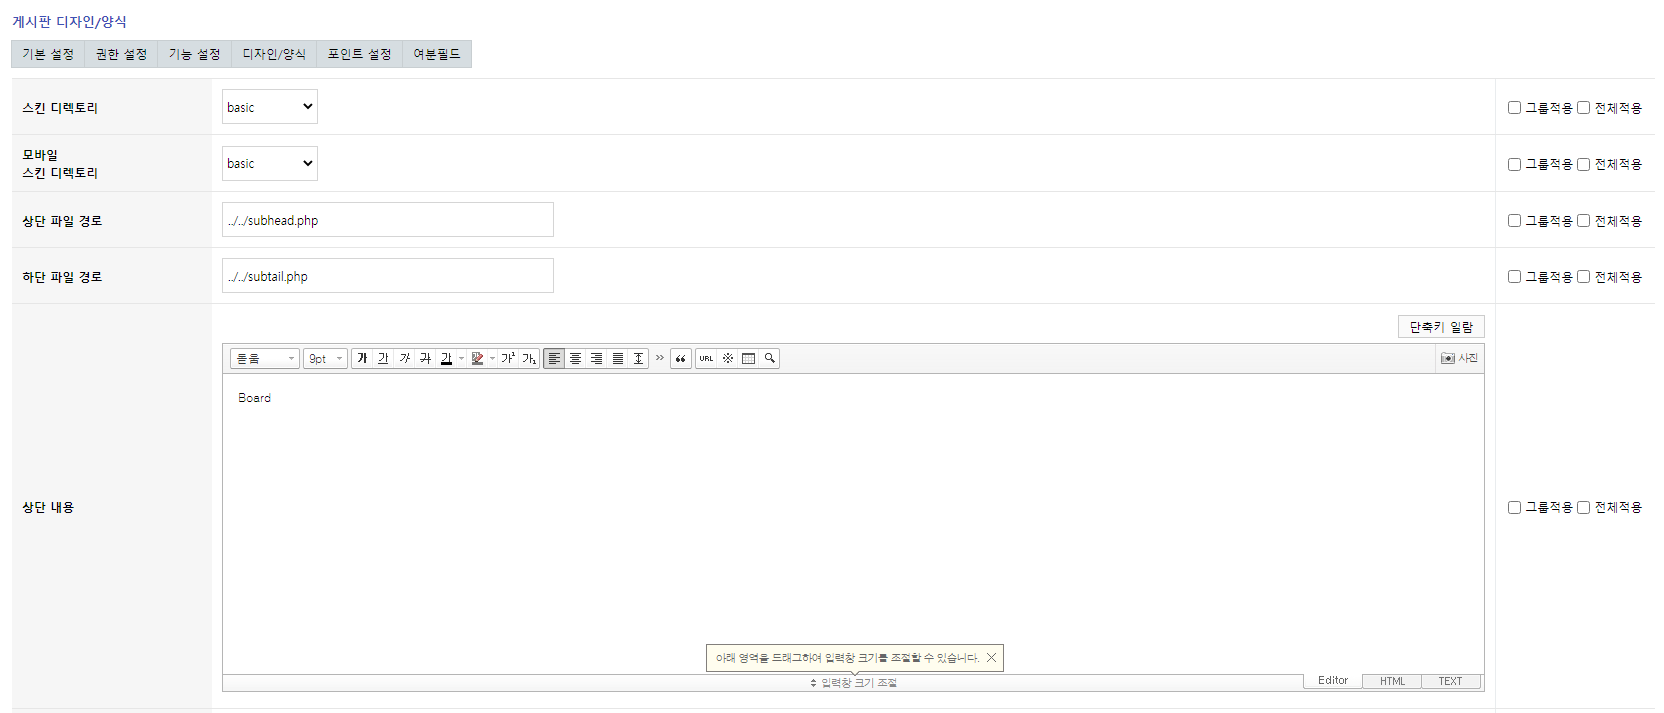
이런 화면이 나타나는데, 상단 파일 경로에 '../../subhead.php' 라고 적고,
하단 파일 경로에는 '../../subtail.php' 라고 작성한 후,
상단 내용에는 Board 라고 작성하고, 페이지의 맨 위에 확인 버튼을 클릭한다.
그러고 나서 '게시판 바로가기'를 클릭하면,
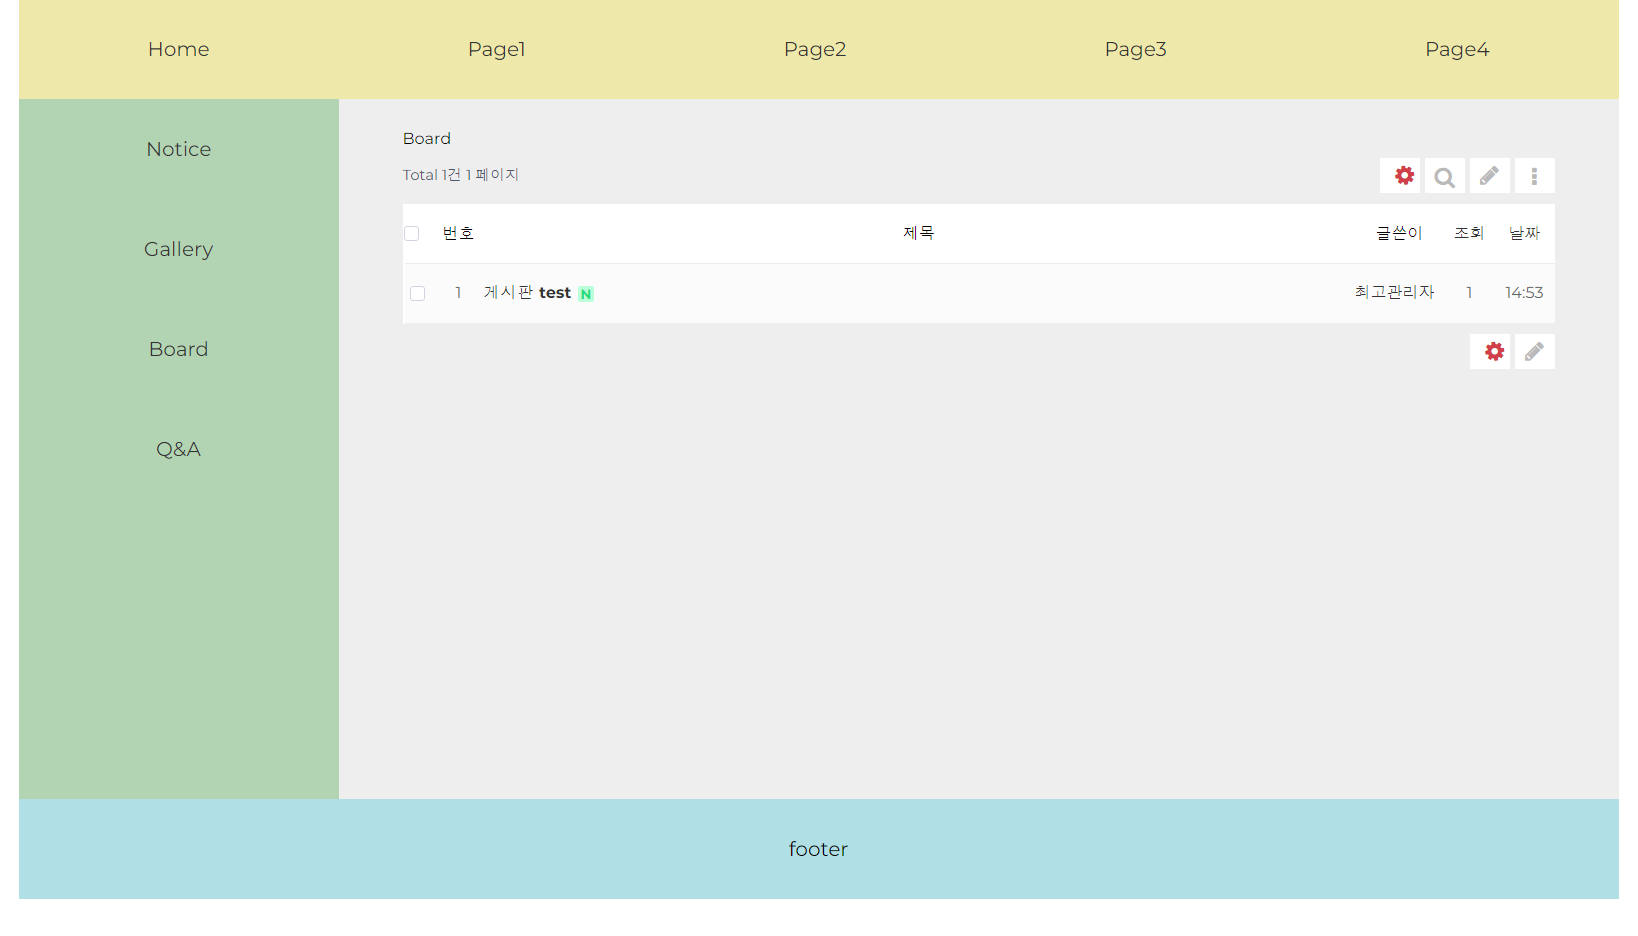
이렇게 게시판이 생성된 것을 확인할 수 있다.
게시판 바로가기를 클릭했을 때 나타나는 도메인을 복사한 후,
VSCode로 이동해 'subhead.php'를 열고, .contents .left에 있는 a 태그에 붙여넣기하여 링크를 연결한다.
      <div class="contents">
        <div class="left">
          <ul>
            <li><a href="#">Notice</a></li>
            <li><a href="#">Gallery</a></li>
            <li><a href="/gnuboard5/bbs/board.php?bo_table=free">Board</a></li>
            <li><a href="#">Q&A</a></li>
          </ul>
        </div>
링크는 복사한 것에서 /gnuboard5 부터 작성해주면 된다.
이와 동일한 방식으로 공지사항, 갤러리, Q&A까지 모두 생성할 수 있다.

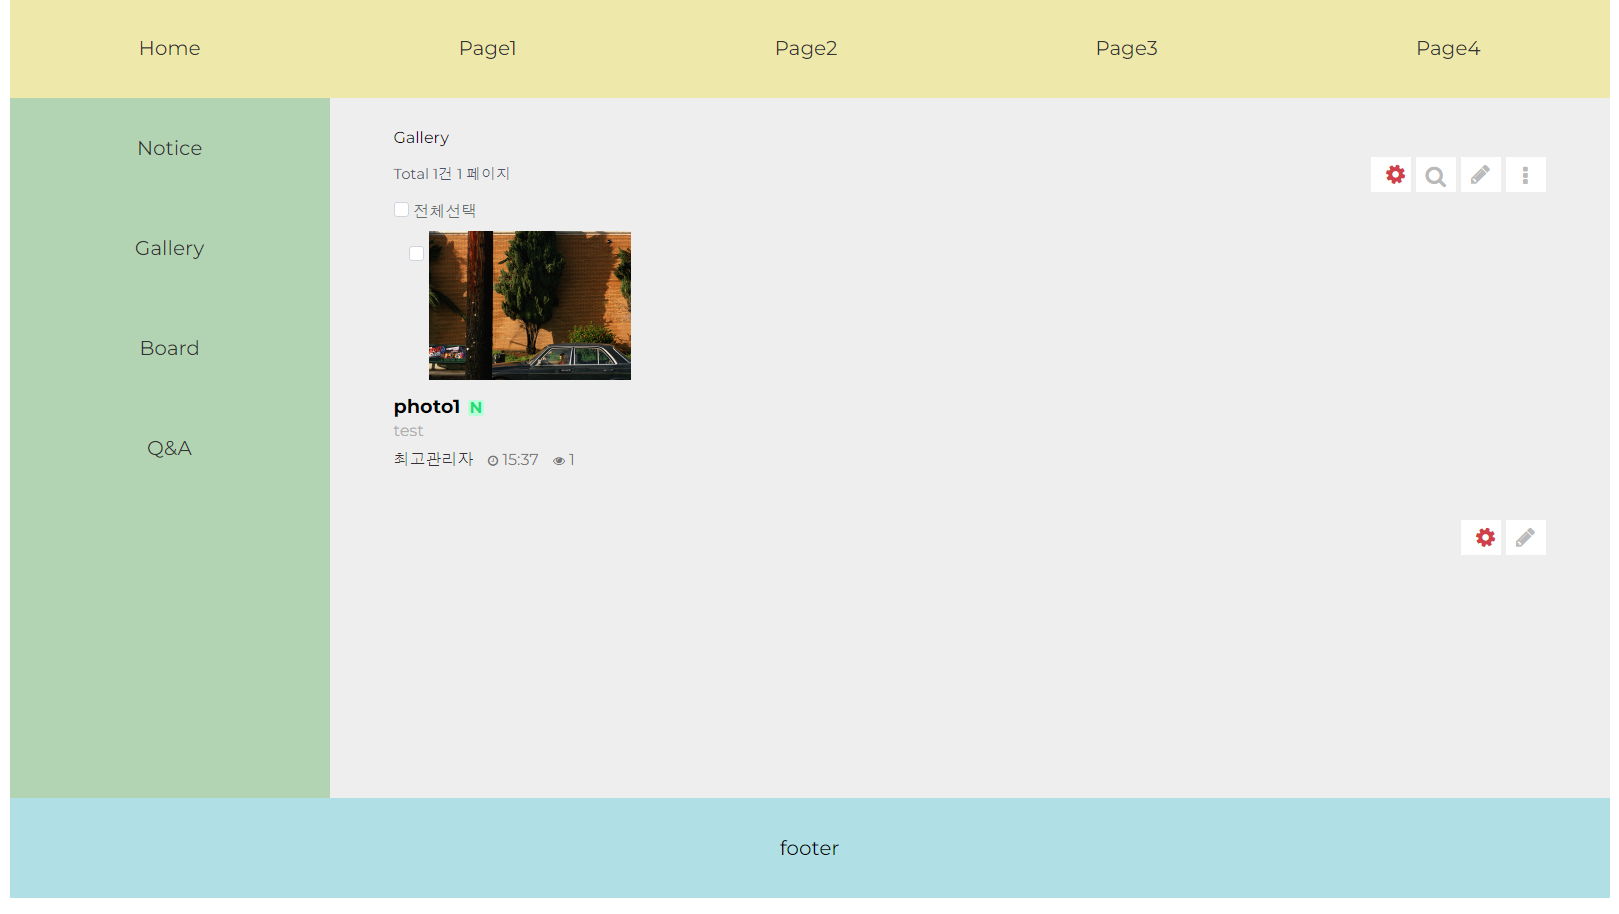
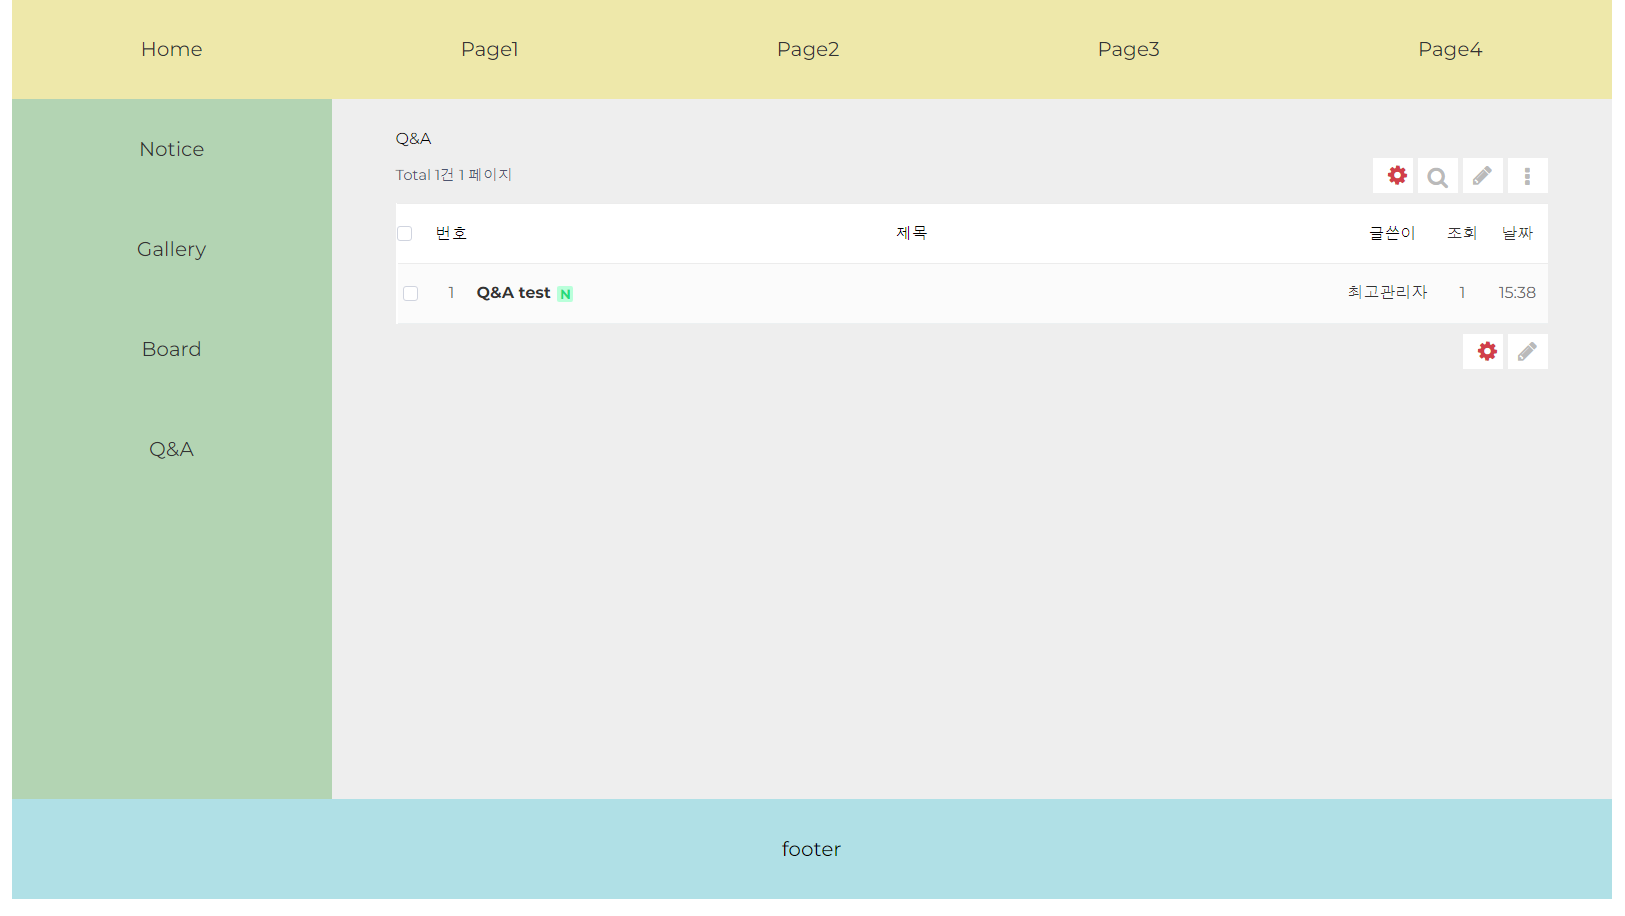
이렇게 모두 완성했다.
여기서 나는 CSS 부분을 수정해서 꽉 차보이지 않지만, 아무 설정을 하지 않았다면 그누보드 란이
꽉차게 보일 것이다.
이에 대해 불만이라면, 'subhead.php' 파일로 돌아가서, .contents .right 부분을 수정하면 된다.
.contents .right 안에 <div class=board></div>를 만들고, </div> 부분만 Ctrl + X를 눌러 복사한 후
'subtail.php' 파일의 가장 윗 부분에 붙여넣기 한다.
- 'subhead.php'
<!DOCTYPE html>
<html lang="ko">
  <head>
    <meta charset="UTF-8" />
    <meta http-equiv="X-UA-Compatible" content="IE=edge" />
    <meta name="viewport" content="width=device-width, initial-scale=1.0" />
    <link rel="stylesheet" href="../../css/style.css" />
    <title>포트폴리오</title>
  </head>
  <body>
    <div id="wrap">
      <div class="head">
        <ul>
          <li><a href="/">Home</a></li>
          <li><a href="page1.php">Page1</a></li>
          <li><a href="page2.php">Page2</a></li>
          <li><a href="page3.php">Page3</a></li>
          <li><a href="page4.php">Page4</a></li>
        </ul>
      </div>
      <div class="contents">
        <div class="left">
          <ul>
            <li><a href="/gnuboard5/bbs/board.php?bo_table=notice">Notice</a></li>
            <li><a href="/gnuboard5/bbs/board.php?bo_table=gallery">Gallery</a></li>
            <li><a href="/gnuboard5/bbs/board.php?bo_table=free">Board</a></li>
            <li><a href="/gnuboard5/bbs/board.php?bo_table=qa">Q&A</a></li>
          </ul>
        </div>
        <div class="right">
            <div class="board">
- 'subtail.php'
</div>
</div>
      </div>
      <div class="foot">footer</div>
    </div>
  </body>
</html>
이렇게 작성해주면 된다.
- 'style.css'
.contents .right .board {
  width: 90%;

  margin: 0 auto;
  padding-top: 30px;
}
그러고 나서 CSS를 수정하면 되는데, 나는 .contents .right .board 부분의 width 크기를 90%로 지정했다.
여기까지하면 완성이다 - !